Computer Tips From A Computer Guy |
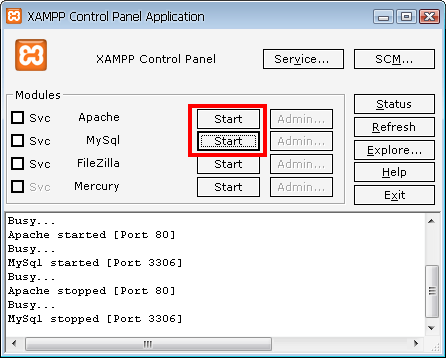
| Basic Joomla installation tutorial Posted: 10 Mar 2009 03:49 AM PDT Joomla is a popular web-based content management solution (CMS). As a CMS, it lets you manage your sites' contents like documents, pictures, HTML and other web documents. This free web application could be used as your corporate or community website, complete with a secured login/logout for users, administration and of course content editing and management. Joomla requires a PHP webserver and MySQL like the one packaged in XAMPP. We have written about XAMPP and SQLyog to guide you with the installation of the required software. The steps below will guide you with installing Joomla. You can get the Joomla package from their official website: http://www.joomla.org/ Step 1. Start the Apache and MySQL services. In XAMPP you will need to click the Start buttons next to each process:
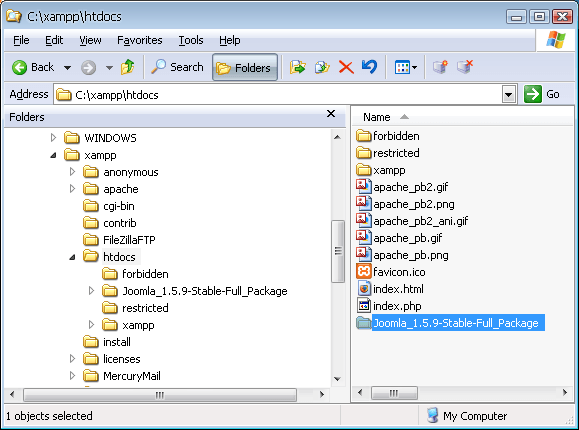
Step 2. Put the unzipped Joomla package on the htdocs folder of XAMPP. I have XAMPP installed on my C:\XAMPP directory so the Joomla folder goes to the C:\XAMPP\HTDOCS folder: You can rename the Joomla folder to anything you want. In my setup I renamed it to myJoomla.
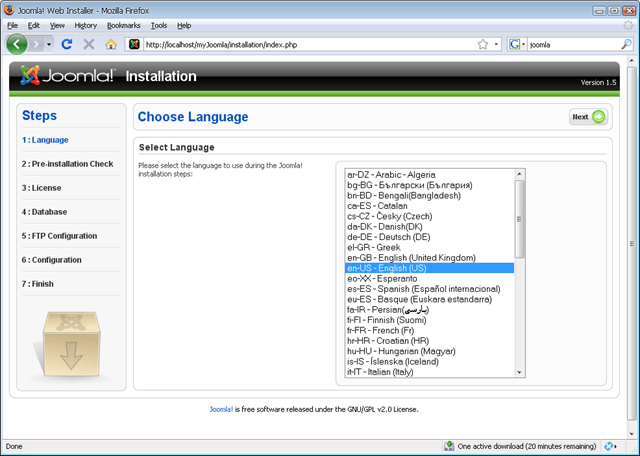
Step 3. Browse the URL where Joomla is placed. If you have it on your computer with folder named "myJoomla" the URL will be http://localhost/myJoomla. You should see the Joomla installer open on your web browser:
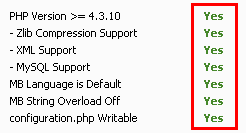
Step 4. Follow the seven steps of the Joomla installer. First step is the language so just choose the language that you want to use. At the second step it is important that you meet the pre-installation check wherein a list of all minimum requirements need to be met:
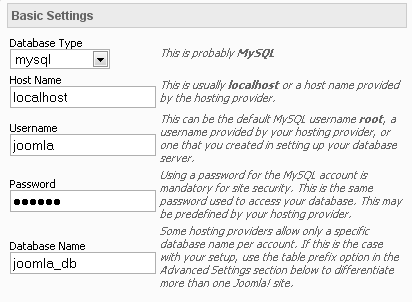
Step 5. Read carefully the license agreement, press next if you agree to the statements provided in the agreement. Step 6. Create a mySQL account that will be used by Joomla so it can save data to the MySQL database. Enter the account details on the fields
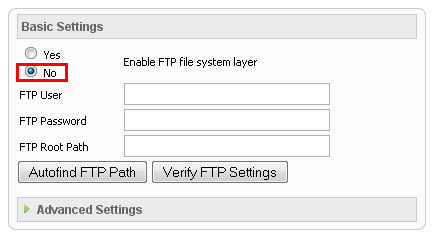
Step 7. You will not need to enable the FTP settings on the FTP configuration screen. This is not required on a Windows OS since you can directly alter the Joomla files using explorer. If you use a secured web host, you should set an FTP account that can access the root directory. You might need to get with the host admin to get the username and password if you want it to be a generic account separate from your user account.
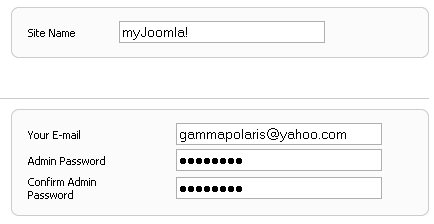
Step 8. Enter the main configuration settings. Enter your preferred site name, admin email and password:
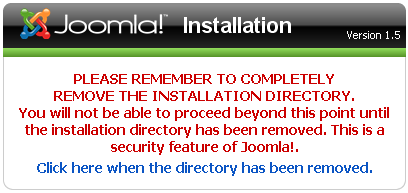
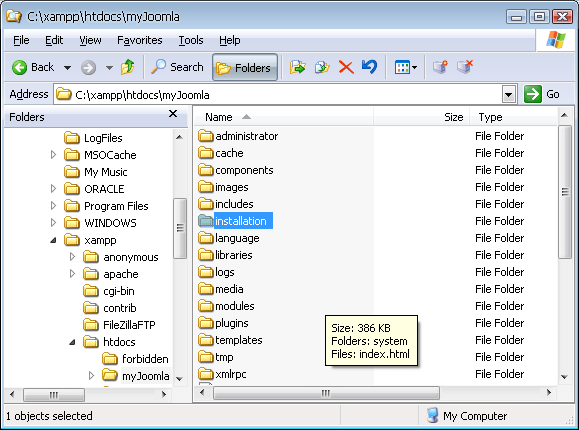
Step 9. At this point you will get a hurdle with a message saying that you need to remove the installation directory:
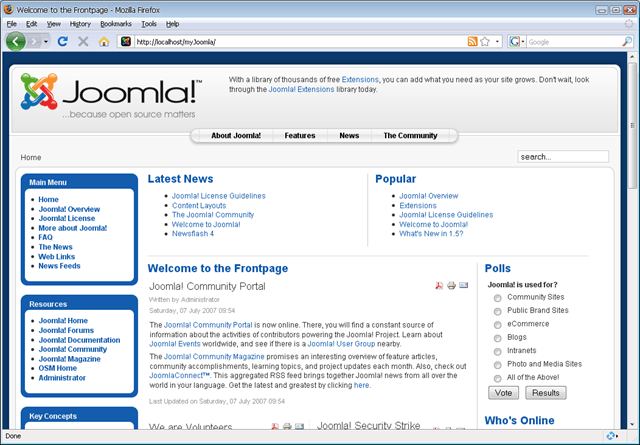
Go to the Joomla directory and delete the "installation" sub-directory. Only this directory needs to be removed so make sure not to touch the other files and directories. Step 10. Whew! You're done! You now have your own Joomla website. If you used the same "myJoomla" folder name then the URL will be http://localhost/myJoomla/
Isn't it a breeze to setup Joomla? On the next posts we will talk about how to customize Joomla.
Related postsCopyright © 2007 Online Tech Tips. Aseem Kishore (digitalfingerprint: a59a56dce36427d83e23b501579944fcakmk1980 (74.125.44.136) ) Post from: Basic Joomla installation tutorial |
| You are subscribed to email updates from Online Tech Tips To stop receiving these emails, you may unsubscribe now. | Email delivery powered by Google |
Inbox too full?  Subscribe to the feed version of Online Tech Tips in a feed reader. Subscribe to the feed version of Online Tech Tips in a feed reader. | |
| If you prefer to unsubscribe via postal mail, write to: Online Tech Tips, c/o Google, 20 W Kinzie, Chicago IL USA 60610 | |