Computer Tips From A Computer Guy |

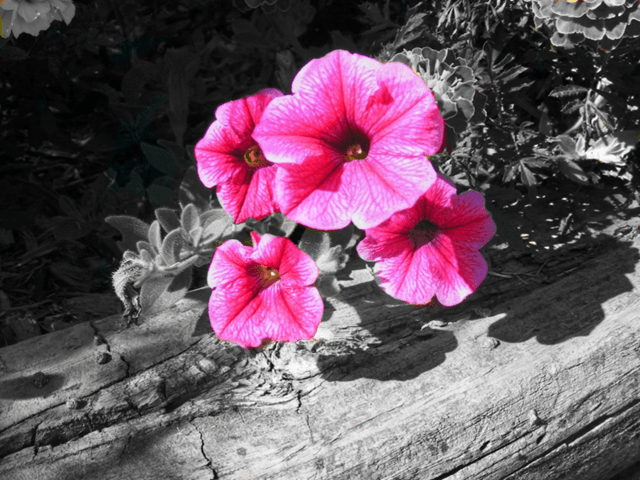
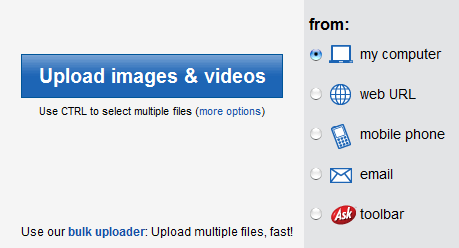
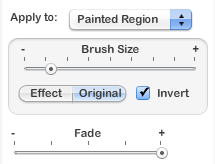
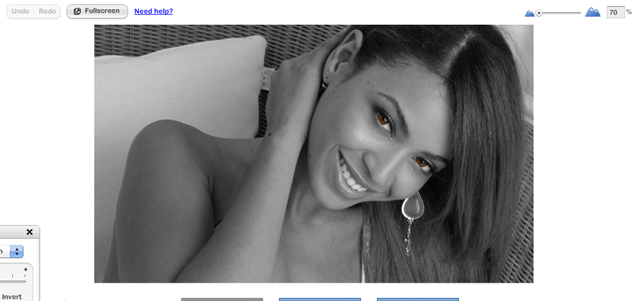
| Posted: 13 Feb 2010 03:12 AM PST Color splashing is a very basic photo editing technique that is used to accentuate certain features of a photograph. By leaving certain areas of a photo colored, and filling the rest of the photo with grayscale, you can highlight certain parts of an image to make them stand out. Chances are, you have probably seen a color splashed photo before. Here is an example. It's a pretty sweet effect that can make certain images pop. So, how do we add this effect to regular photos? There are a variety of different ways to achieve color splashing. It all really depends on which photo editing software that you use. However, for this tutorial, we will be using the free online editor, Photobucket. So, to get started, you will need to get a Photobucket account if you do not already have one. Basic accounts are completely free. You can get one here. After you are all setup with Photobucket, make sure that you are logged in to your account. Click the My Home button to get to your images page. Click the Upload images & videos button located in the center of the My Home screen. Select your photo, and click the Open button to upload it to Photobucket. Upon upload, the next screen will ask you to enter a title, description, and tags for your photo. This is all optional. However, you should at least enter a title so that you can keep track of your photos easily. Go ahead and enter a title and click the Save & Return to Album button. You should now be at your album home page. Click the edit link which is located directly above your photo, next to the move, share, and delete links. This will automatically load your photo into the Photobucket editor. From the photo editor, click the effects tab, than the grayscale button. Your image should turn black and white. Click the advanced options button to load the editing pane. Set the Apply to: option in the editing pane to Painted Region. Make sure that the button is set to Original and not Effect. Click to put a checkmark in the Invert box. Move the slider from left to right to resize the cursor to work best with your image. Move the image zoom slider left or right to zoom in on the area that you would like to add color to. Position the cursor over the part of the image that you want to color splash. Hold down the left mouse button and proceed to "paint" the image and unmask the original color. After you have finished with the color splash, move the zoom slider to zoom back to the original size. Click the Save a Copy button to save your freshly edited photo. Wait a couple of minutes for the image to save, and that's it. You should now have easily color splashed a photo. Below is the final result from the demo.
Related postsCopyright © 2007 Online Tech Tips. Aseem Kishore (digitalfingerprint: a59a56dce36427d83e23b501579944fcakmk1980 (74.125.158.82) ) Post from: 
      |


| You are subscribed to email updates from Online Tech Tips To stop receiving these emails, you may unsubscribe now. | Email delivery powered by Google |
| Google Inc., 20 West Kinzie, Chicago IL USA 60610 | |
