Computer Tips From A Computer Guy |

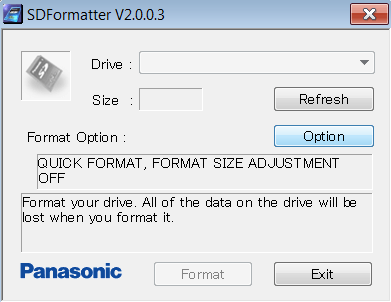
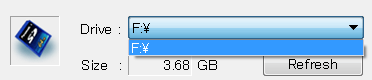
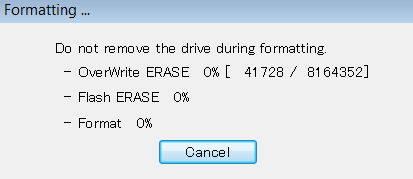
| Format an SD Card the Easy Way Posted: 05 Jan 2010 03:19 AM PST SD cards can be tricky little gadgets. They sit in our cameras and cell phones, just waiting for us to take the picture of a lifetime…at which time, of course, they stop responding. While nothing can predict when or where an SD card will die, proper formatting can both lengthen the life of the card and provide the most available space possible. The SD Association provides an SD card formatter for this purpose. Yes, they recognize Windows has a built in formatting program; however, they warn that by using the generic operating system formatters, "optimum performance may not be experienced." Translation: SD card death and less picture-saving space. The program downloads as a 1.28 MB executable file compatible only with Windows (the Read Me file cautions Mac users not to use the application). Both SD and SDHC cards are supported, and using a USB card reader is recommended for the formatting process. The application initializes with just one small screen. First, select the drive containing the card you wish to format. Likely, this will be E or F for most Windows users. Notice that when you select the drive, the size of the SD disk appears just below the selection. For the 4GB card used in this article, the size is recognized as 3.68 GB. Next, click Option to select how you want the SD card formatted. A dialogue box appears with a dropdown menu listing three "format type" options. The first, Quick, is simply a standard wipe of the disk—all data currently on the disk will be erased. The second, Full (erase off), will put the disk into a proper SD format, but beware: even though it says "erase off," all data on the disk will be deleted, or rather, overwritten. However, the "flash" erase, which truly deletes all data beyond the realms of easy recovery, is not used in this second option. Thus, the third option, Full (erase on),—is the option you will want to use most often, as it formats the card properly, while giving it a fresh start with no old data left on the disk at all. Not all cards support this, but if you choose this and the card does not support the option, the formatter automatically reverts to the second "erase off" option during the formatting process. Under the Format Type dropdown menu is a second menu called "format size adjustment" that asks if you want to try to increase the amount of space on your SD card or not. Turning this option on will allow you to use the maximum space possible on your SD card. Once you have made your selection, click OK. You will be brought back to the original formatter screen where it should display the options you just selected: Finally, click Format. You will be asked one last time if you are sure you want to do this. If you are sure, click OK. A new dialogue box then displays the status of your formatting efforts. For the options selected above, it first erases all files from the disk, then formats it. If you are using a larger disk, as in this example, this process will take a few minutes. Do not turn off your computer or remove the disk until the entire process is complete. When complete, a dialogue box appears telling you the results of the formatting process. In the example above, the card used is a Micro SD card, which does not support the full erase option. The dialogue box shows this by stating it performed a full format, but could not "flash erase"—which is perfectly fine. The SD card will still have a nice, fresh start and prolonged life for taking pictures and storing files. SD Formatter is available from SDcard.org.
Related postsCopyright © 2007 Online Tech Tips. Aseem Kishore (digitalfingerprint: a59a56dce36427d83e23b501579944fcakmk1980 (74.125.158.80) ) Post from: 
      |


| You are subscribed to email updates from Online Tech Tips To stop receiving these emails, you may unsubscribe now. | Email delivery powered by Google |
| Google Inc., 20 West Kinzie, Chicago IL USA 60610 | |
